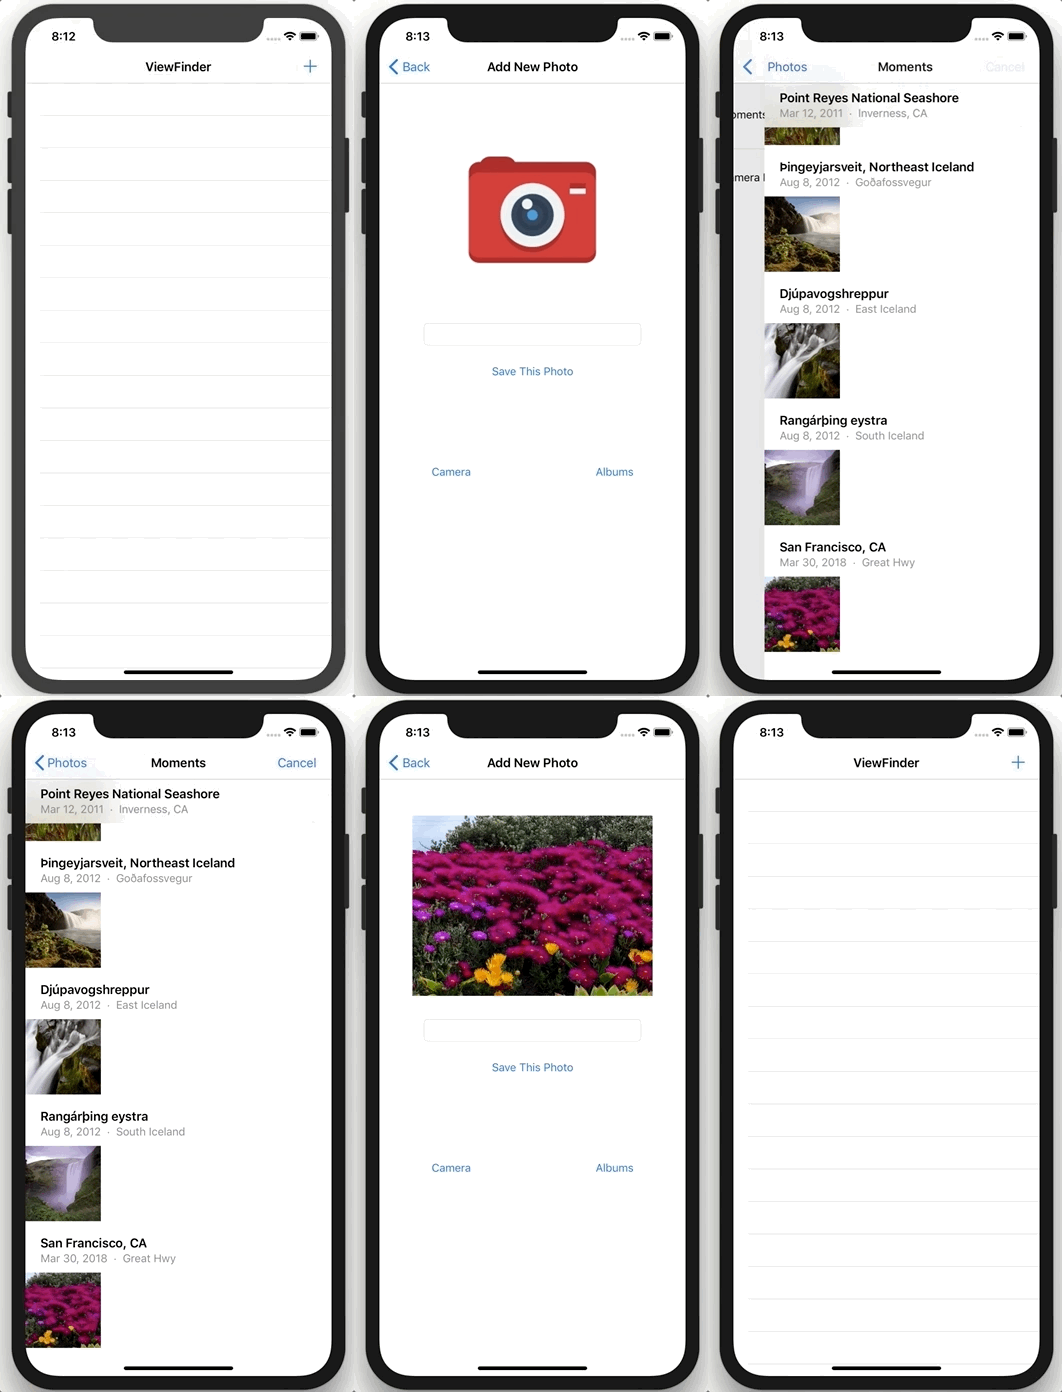
Iteration 1: Camera & Photos
Iteration 1: Camera & Photos
Learning Goals
- Implement accessing the camera/photo library and displaying photos into their personal apps
Plan
Using your references and all that great practice with accessing the camera and displaying selected photos, we are starting to put the pieces together! The gif below demonstrates the functionality you should have at the end of this iteration.

Getting Started
- Open up your ViewFinder project
- Make sure you’ve completed Iteration 0 before starting this!
Implement Camera & Display Photos
-
Add a new
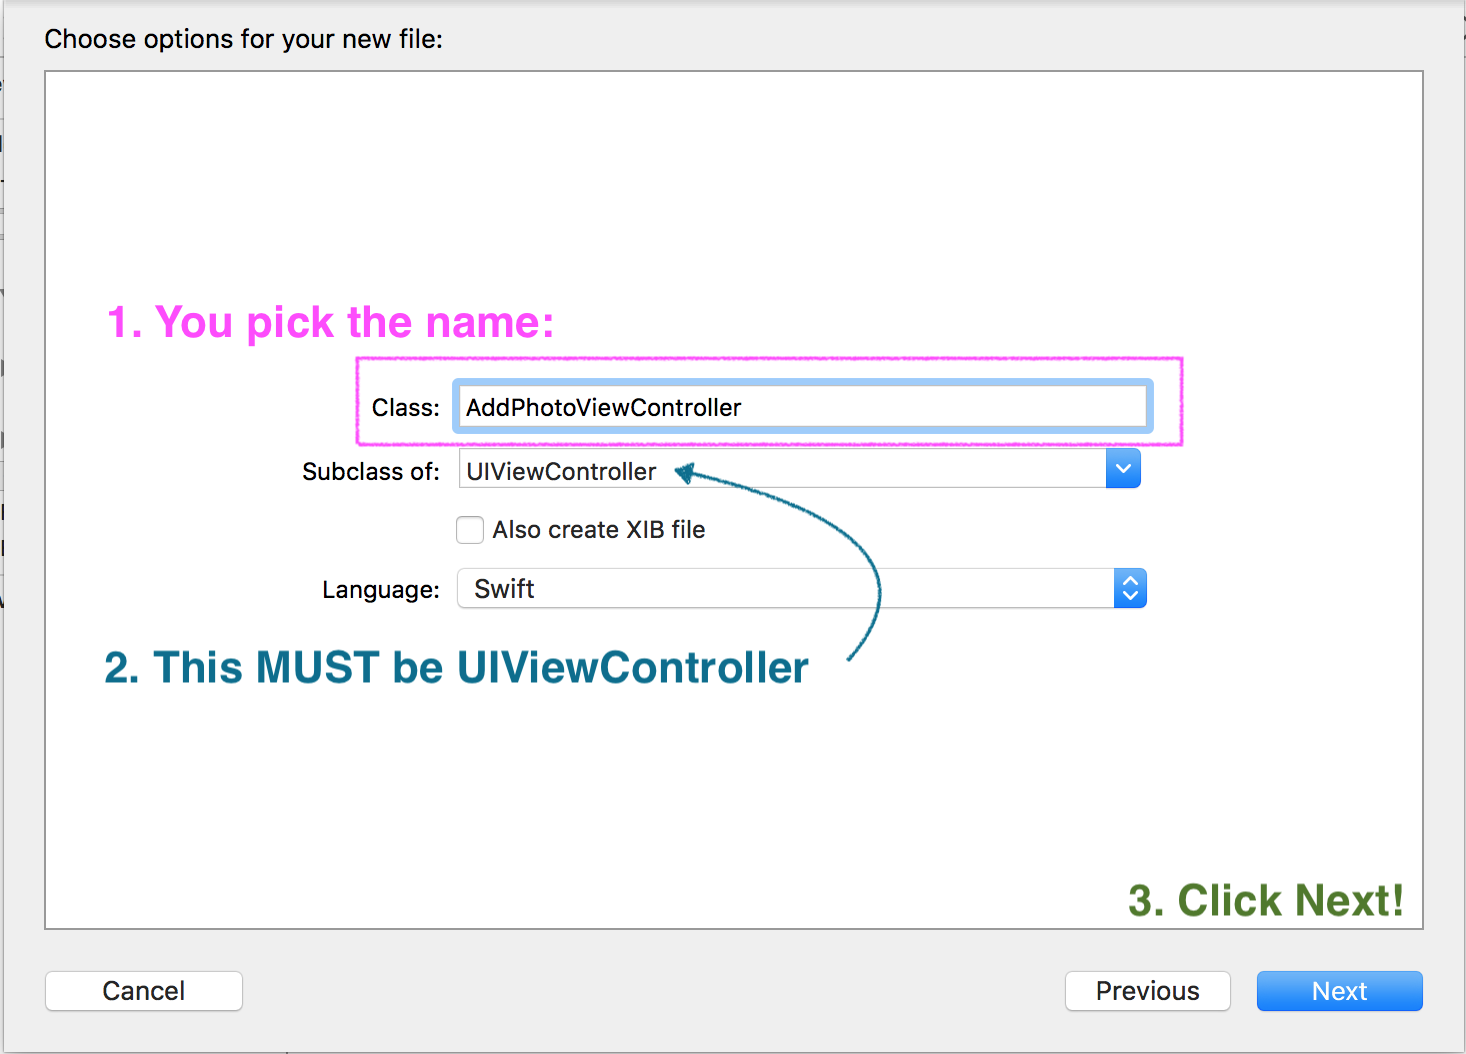
ViewController.swiftfile - code version of theAdd Photo Viewon our StoryBoard. Here’s how: File ➡ New ➡ File ➡ iOS ➡ Cocoa Touch Class ➡ ClickNext -
Give your
ViewControlleran appropriate name (maybe AddPhotoViewController? NewPhotoViewController?), make sure it is a subclass of UIViewController in the dropdown ➡ ClickNext➡ ClickCreate

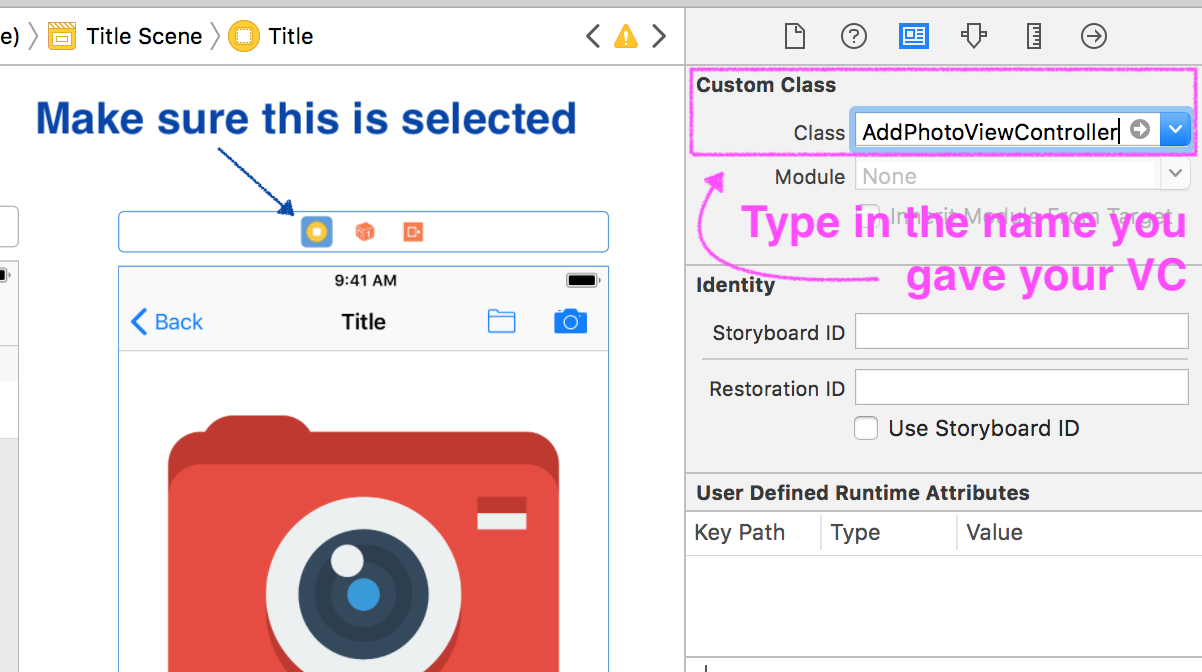
- Now we need to connect the View in the StoryBoard to the code. While you have the
New Photo/Add PhotoView selected, go to the Identity Inspector in the Utilities Pane. In the form for class, type in (it will autocomplete) the name you gave your ViewController class. You can also select it from the drop-down menu.

Run your app in the simulator to make sure it’s building! Not much should happen; that’s ok. We just want to make sure it doesn’t crash.
For the following steps, look back at Accessing the Camera & Displaying Photos Lesson if you’re stuck!
- Use the
Info.plistto ask user for permission to access camera and photoLibrary. - Inherit from
UIImagePickerControllerDelegateandUINavigationControllerDelegate - Create an instance of
UIImagePickerController, stored in a property on that class - Tell that property to give it’s information to this class
- Create actions for all buttons, and an outlet for the placeholder photo and text field
- Inside of your actions for “Take Photo”, “Find Photo”, etc., write the code necessary to access the camera/library/albums, based on which action you are in.
- Write the
imagePickerControllerfunction. Again, feel free to reference the lesson from this.
Commit Your Work
In your terminal, make sure you are still in the viewfinder directory. Add and commit your changes. Your commit message should be something like “Complete Iteration 1”.
Let’s keep going! Move on to Iteration 2
Extension
- Continue refining your UI - colors, fonts, sizing, etc!